I am so happy. My air cleaner and hose and clamps are here. This weekend I hope to be out riding. Everthing I need to get the bike running is done except the installation of the air cleaner. I got the air cleaner from Ohio Cycle(very fast shipping and excellent service). The hose came from Orazio Cycles on Ebay.
Well, with alot of help from my husband, I got the bike back together. Time to check on the air cleaner. Hmmm. There is NO air cleaner. Another delay. I have to order an air cleaner and the hose that attaches to the carb.
I told you the sprocket was very worn. See the comparison?
Here is the rubber boot that goes over the swing arm under the chain.
What a difference having the rat sh-t gone!!
I grew up in Northern New York State almost near the Canadian Border. I know it is just like a farmer to replace a broken foot peg boot with a rubber hose that was attached to the peg with nuts and bolts!!
Here is another stupid thing a farmer would do..weld a piece of steel to the shifter because his foot is too big. Luckily I found a nice replacement on ebay for $9.00.
When I got my Dream, the neutral light was inoperable. When stopping at lights in traffic, I like to know immediately when I am in neutral. So I decided to research the problem. Well it turned into a big problem(My "Dream" turned into a nightmare). I first removed the headlight and accessed the neutral light bulb and it's wiring. The bulb seemed to be ok. I tested it on a Harley Battery and it lit! I replaced the bulb. I checked the wiring diagram in my owners' manual to see where the juice is suppose to come from. The manual showed the current came from the battery to the bulb and grounded through the neutral switch. To see if I had current through the socket I turned on the ignition and grounded the socket and it lit. Now I had to find out if it was a wiring problem or the neutral switch.
My husband is posing for me.
Not knowing where the neutral switch was, I traced the green wire with red tracer to a union underneath the carburetor. I decided to open the union and as I was doing so (the ignition was still on - don't worry, I had the points open to keep them from burning), I saw the neutral light flash. Ah ha, a bad union, or so I thought. I stuck a piece of paper in the points.
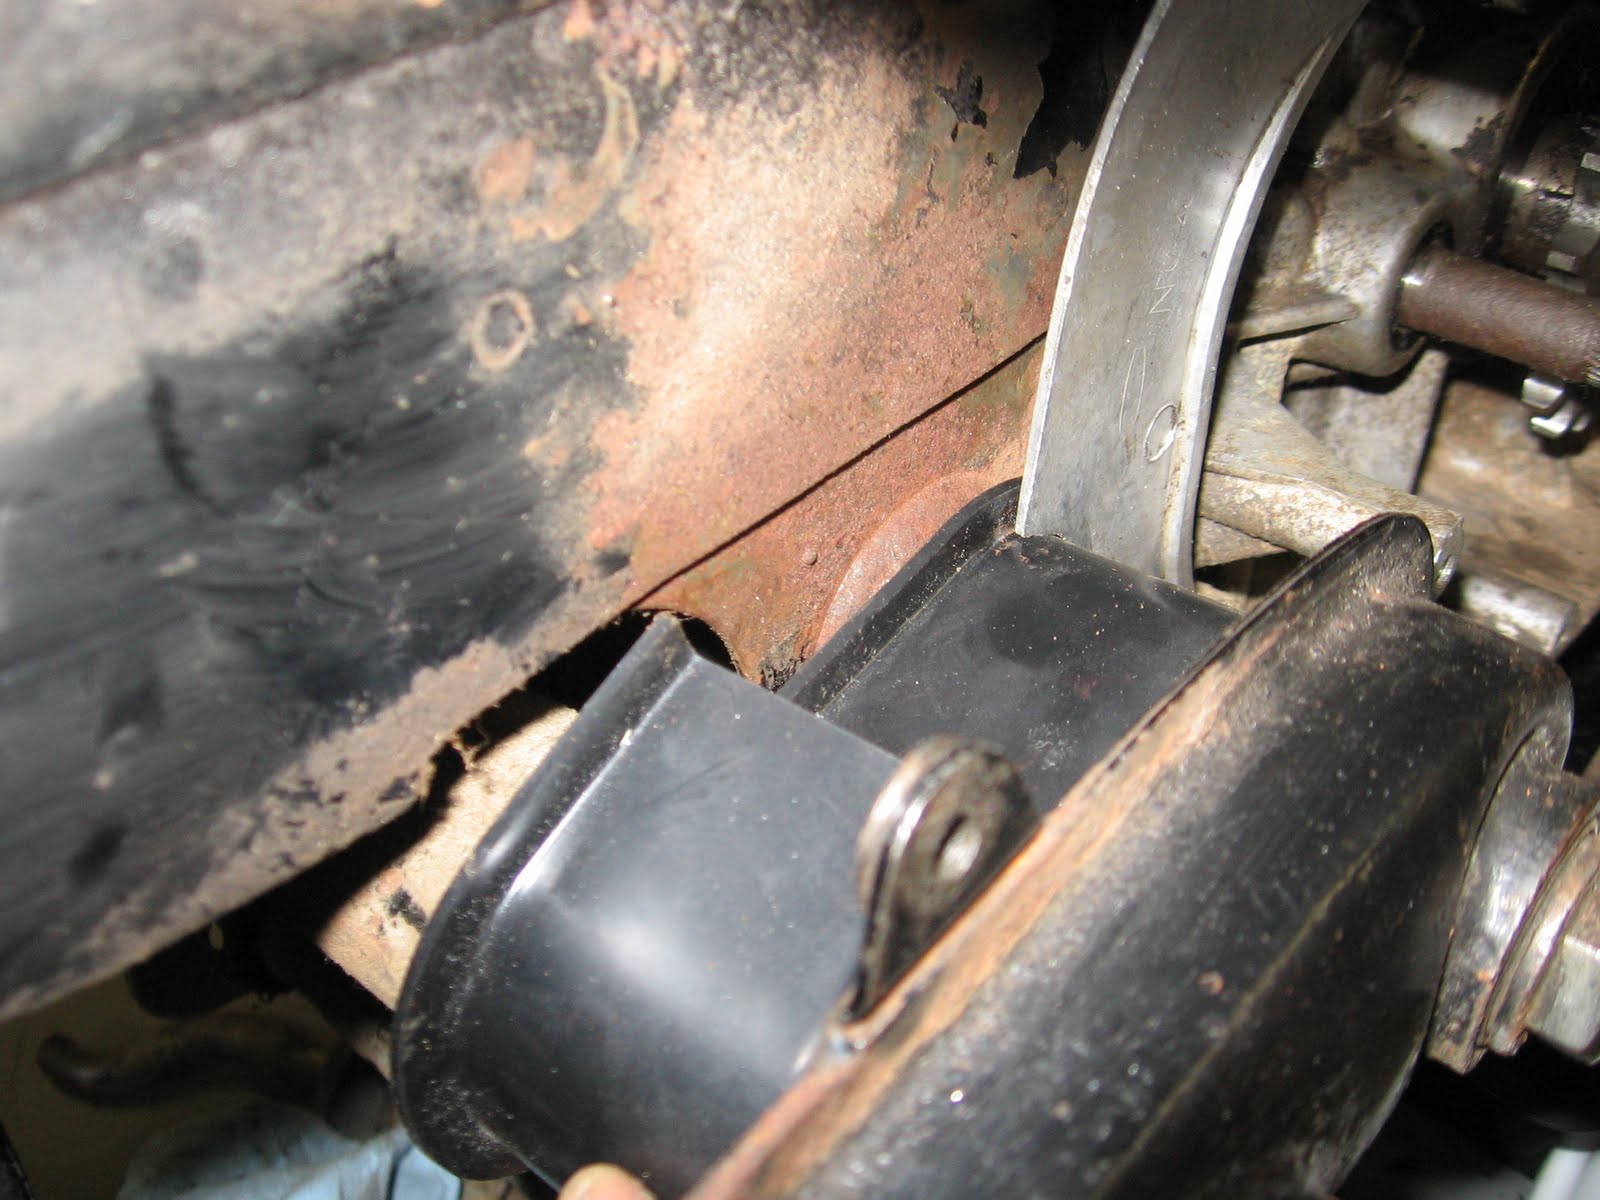
I opened the wiring union and tested the wire back to the switch with a VOM, nothing. It had a bad solder joint. I desoldered the end and retested. Still nothing...? Why did I get the flash of current? While poking around, I noticed the VOM jump (set to OHMs). I realized it did this everytime I pushed on the wire back into the drive chain sprocket cover. How odd. Around this time I discovered a removeable rubber inspection cover on the sprocket cover and removed it. With a flash light, I saw the neutral switch, but it only had about 1 inch of wire and no more. Darn, now the cover has to come off (and the nightmare begins). I was not prepared for what I was going to find next. I removed all the screws and pulled the cover. Oh YUCK!! A huge rat's nest and my hands are right in the middle of it. This is where I called in the big guns. "Oh Dear, come give me a hand please". He scrapped out the rat's nest and saw that the neutral wire had been bitten in two. The VOM was showing the ground when I pushed it into the cover because the bare end was touching the case. See the neutral switch just above the chain to the right? You can barely see the black short wire where it was chewed.
Here is a better picture of the neutral switch where the wire had been chewed.
As the rat's nest was large (seed husks, cotton stuffing, and of course, excrements) and because I had ridden the bike, a large portion of the nest now resided in the lower chain cover. Off with the lower cover. Now the snow ball was really starting down the hill. Once the lower cover was off, it was apparent the the rear sprocket was worn. Really worn. So worn, that it was obvious it had been turned around at least once in its life (the front sprocket looks new). Off with the chain! Naturally, my husband found that the master link clip was backwards. It is only a good idea to have the clip inserted against the wheel's rotation if you desire to have the chain running out the back of your motorcycle like a crazy snake and if you have an enclosed chain guard like the Dream, you are going to need to replace alot more than a master link. Here is a picture of the backwards masterlink clip on the chain. To get the sprocket off, the chain guard upper cover had to come off, which meant the shock absorber had to be removed, as well as the rear axle. So while I wait for a new rear sprocket and chain (oh yeah, the chain was shot), I fixed the neutral switch. Here are the pictures of the step by step repair.
Ok I said next I would fix the neutral switch, but I got my tank emblems and could not wait to put them on. It makes the bike look so much better.
Before:
After:
The picture below looks like there is acrack in the emblem, but it is just some type of reflection.
I was bragging about how great the bike runs. I wanted to get the neutral working and it has lead to a HUGE "chain reaction". No pun intended! Stay tuned....
Time to clean the oil filter. I don't think it has been cleaned in a very long time. The owner's manual says to unscrew the cover and remove the shaft. See the instructions below.
Ok. I am unscrewing the cover
MMMMM... I took out the oil cleaner with the shaft, but guess what. It is all connected to a sprocket with a chain that the manual does not address. Sorry that this picture is blurry and that I was not able to capture the picture of the chain as it lay on the floor. I found out that the sprocket and chain spin the filter to clean it.
I cleaned everything with petrol as suggested.
Here is the oil filter all back together. I had to enlist the help of my son, Casey. He had to carefully but the chain back on the sprocket
I am a transplanted Floridian who enjoys flying, carpentry, and motorcycling. I am married to a diehard Harley Enthusiast, who has written 2 books on Harley Davidson restorations, owns several vintage harleys, and has limited knowledge regarding Honda restoration. But with his help I am going to attempt to restore my Honda Dream 305 that I recently purchased. It may be a slow process, but I will be documenting each step as I go. If you are interested, please follow me on this blog. I will welcome any constructive criticism